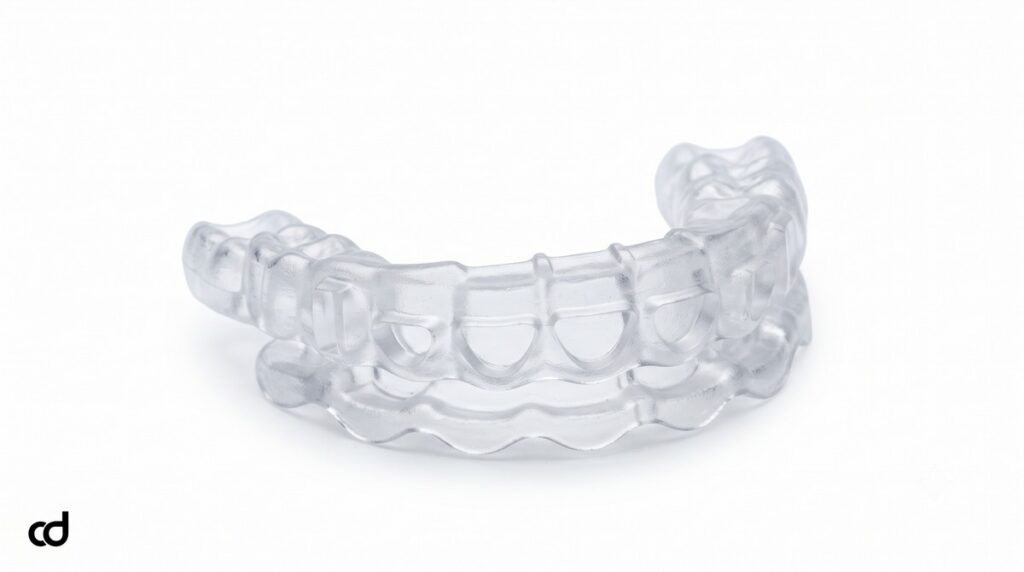
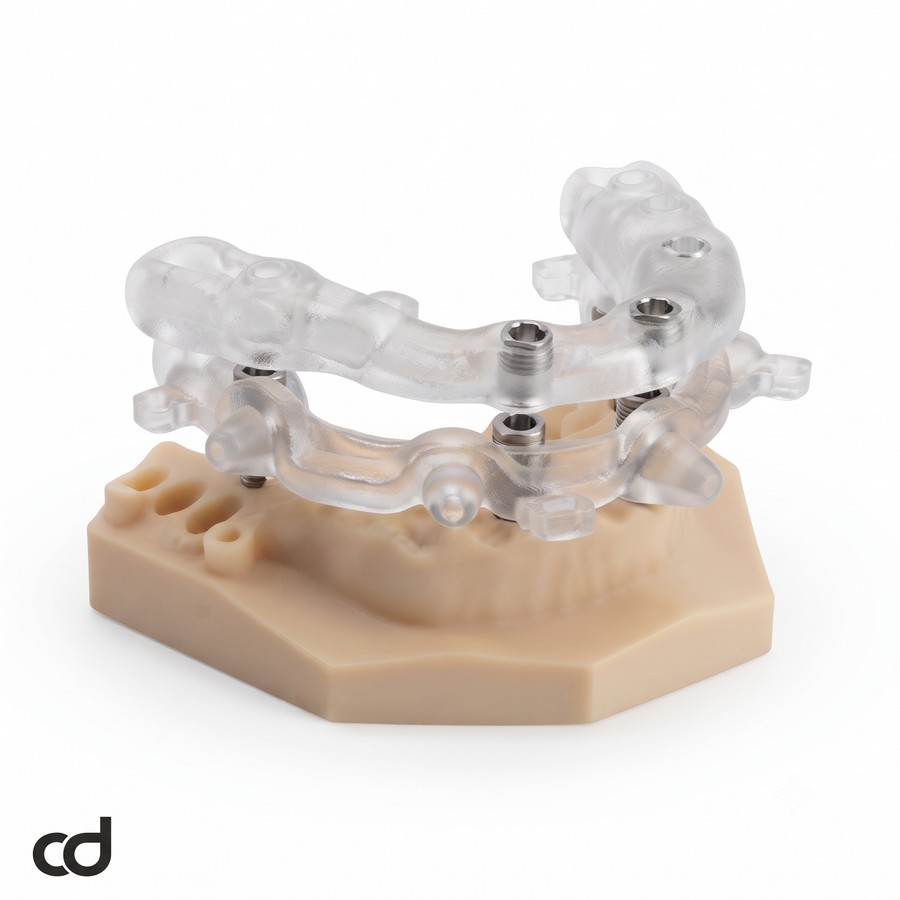
Description: Curedent Implant Surgical Guide | Guided Surgery Precision – Maximize implant placement precision and restorative success with Curedent tooth-supported surgical guides. Custom CAD/CAM engineered for predictability.
Section 1: Product Introduction & Clinical Purpose
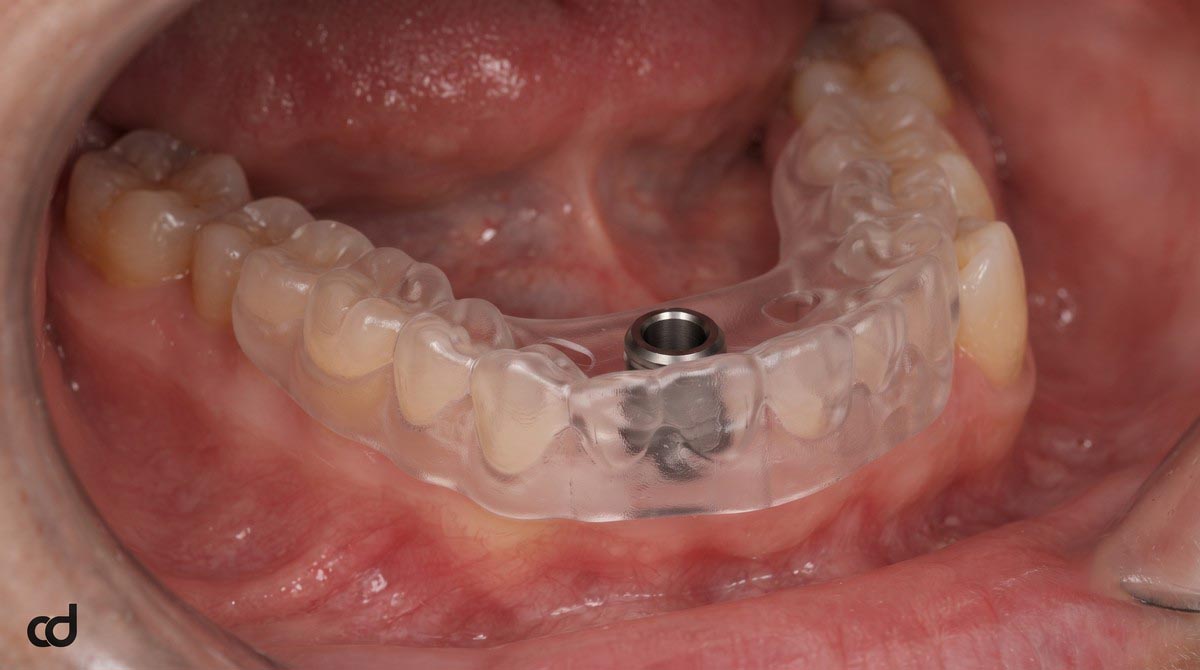
The Curedent Single Implant Surgical Guide is a patient-specific, CAD/CAM-manufactured surgical appliance designed to transfer digital implant planning directly to the clinical operatory. Tailored for implant surgeons, periodontists, and restorative clinicians, this guide eliminates the spatial guesswork of freehand osteotomy preparation, ensuring that every osteotomy matches the exact depth, angulation, and prosthetic corridor established prior to surgery.
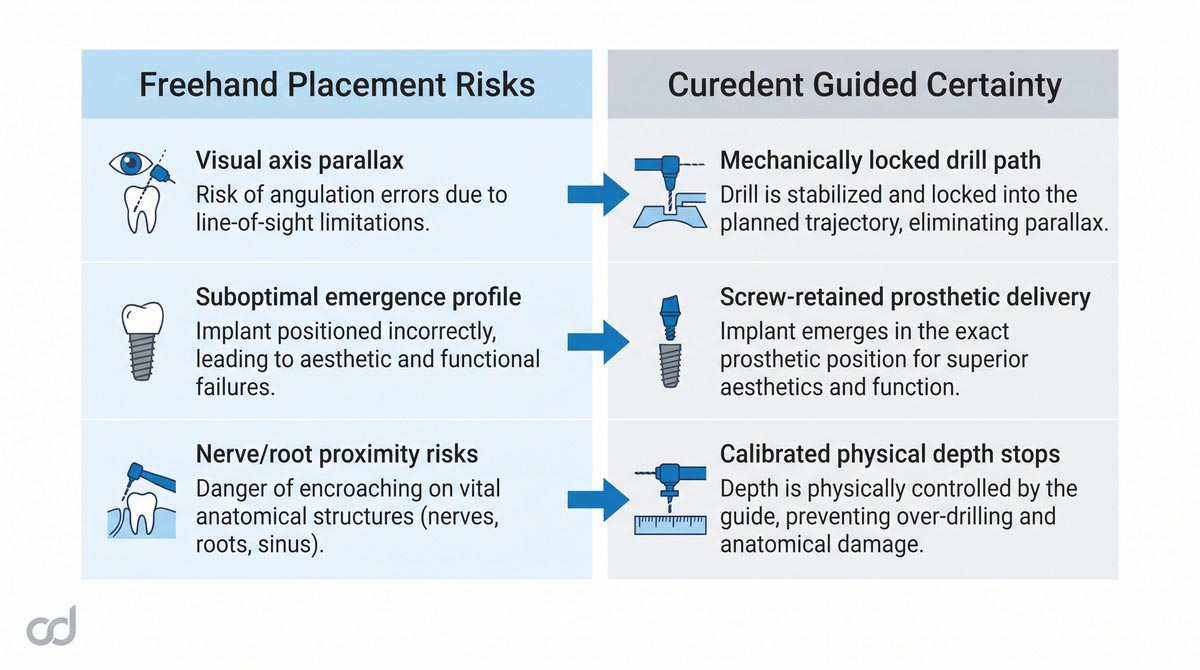
Freehand fixture placement frequently introduces angular drift and linear shifts at the osteotomy base, leading to compromised emergence profiles, difficult hygiene access, and excessive reliance on angled custom abutments. The Curedent surgical template enforces prosthetically driven implantology, ensuring that the ideal crown contour and occlusal plane dictate the exact 3D positioning of the underlying implant fixture rather than incidental local bone morphology.
Key Clinical Advantages
- Eliminates Freehand Axial Drift: Locks drill trajectory mechanically to prevent angular tilt and lateral displacement.
- Streamlines Prosthetic Delivery: Positions fixtures precisely for screw-retained restorations and balanced emergence profiles.
- Protects Vital Anatomy: Controls working length to preserve adjacent root membranes and mandibular neural canals.
- Enhances Patient Confidence: Minimizes invasive flap reflection, shortens chair time, and reduces postoperative morbidity.
Section 2: Product Anatomy & Physical Construction
Medical-Grade Polymer Matrix
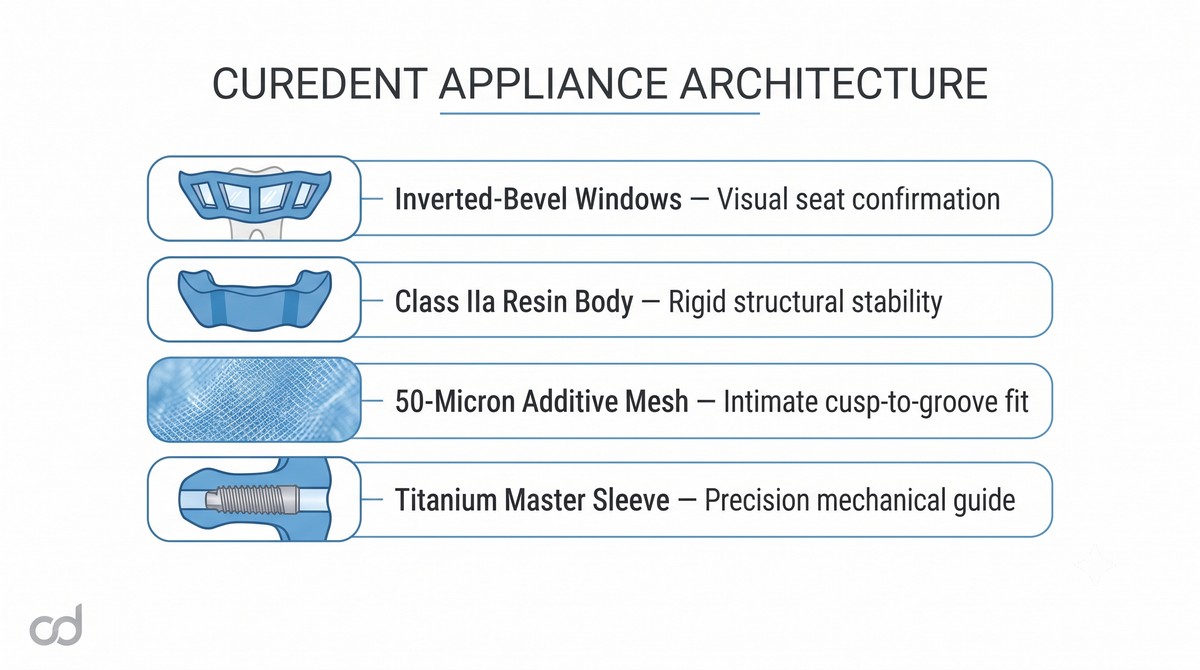
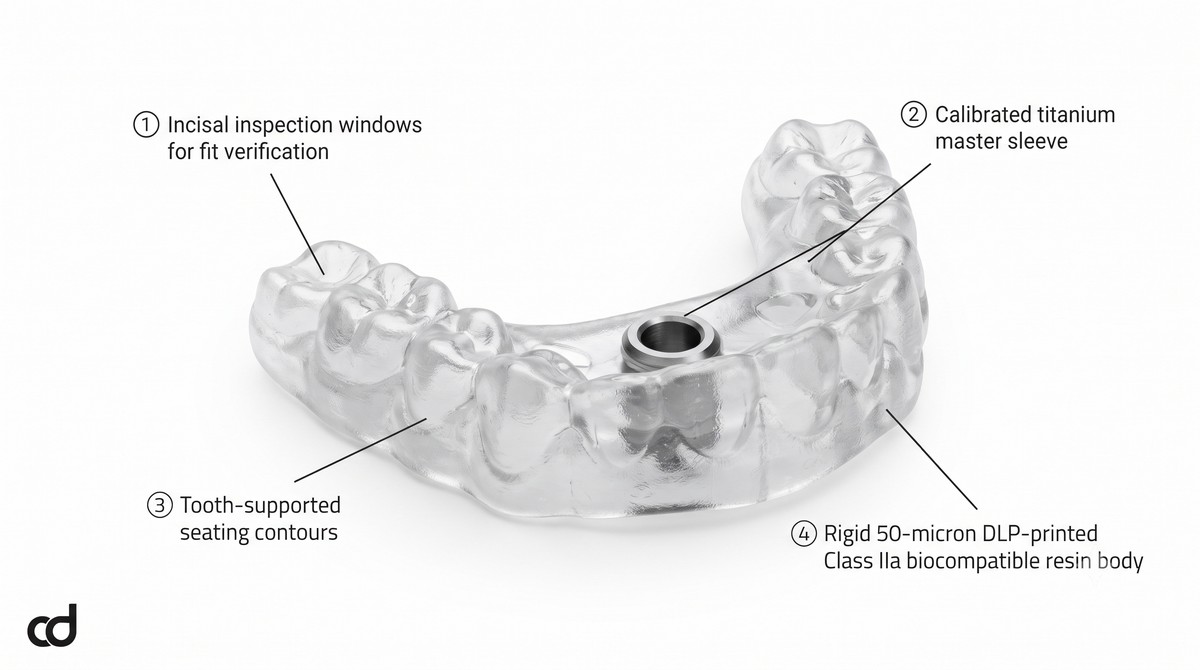
Every Curedent guide is fabricated from a certified Class IIa biocompatible surgical photopolymer. The material delivers high flexural modulus and dimensional stability, resisting intraoral deformation, moisture degradation, and micro-fracturing under operative loads. High optical transparency ensures continuous, unhindered visibility of underlying hard and soft tissues during seating and instrumentation.
High-Resolution Additive Manufacturing
Curedent utilizes high-precision Digital Light Processing (DLP) and Stereolithography (SLA) additive systems running at ~50-micron layer resolution. This dense layer build captures minute anatomical features—such as cusp ridges, incisal angles, and embrasure spaces—ensuring exceptional passive adaptation across the arch while preventing internal voids that compromise rigidity.
Calibrated Titanium Master Sleeve
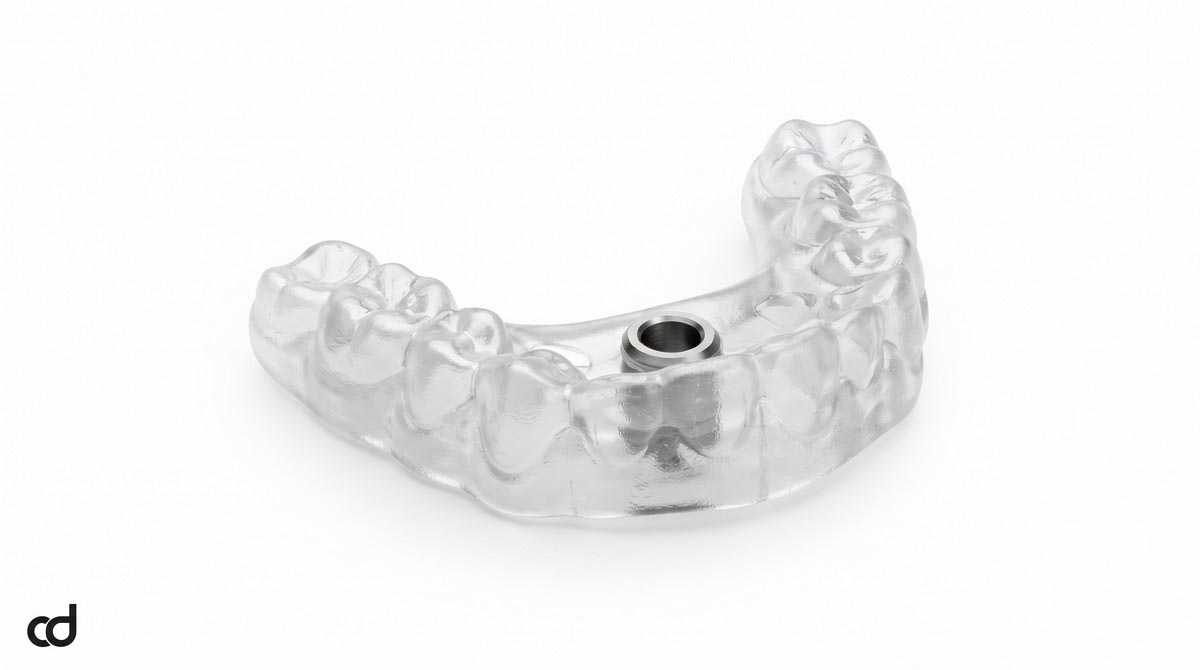
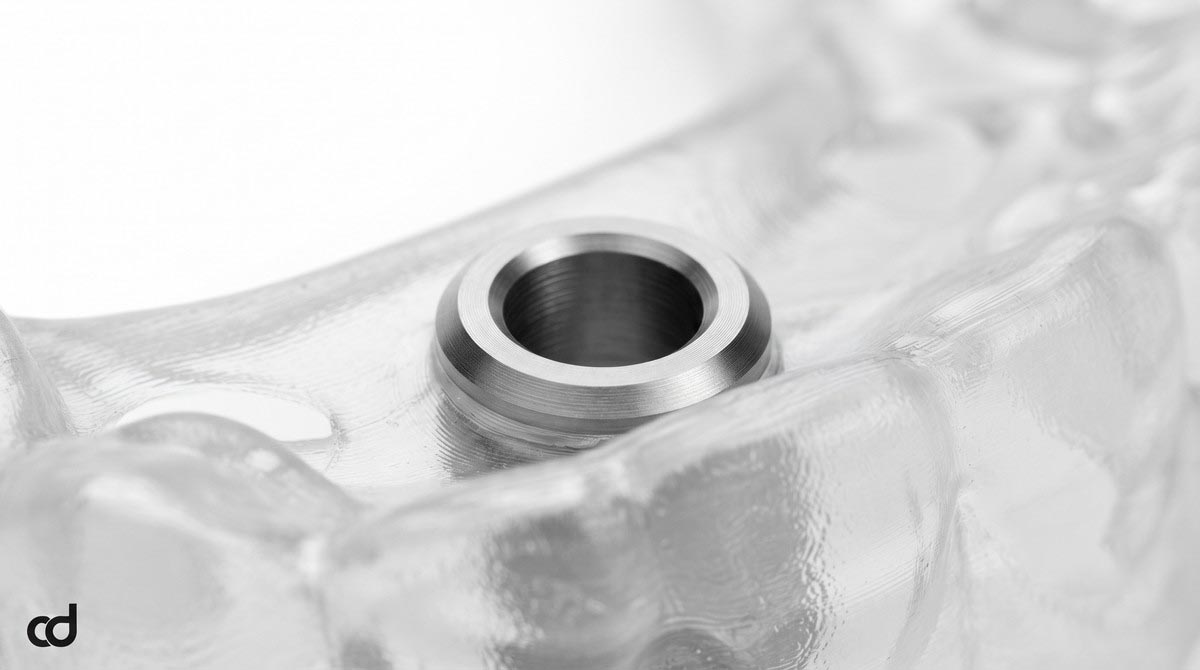
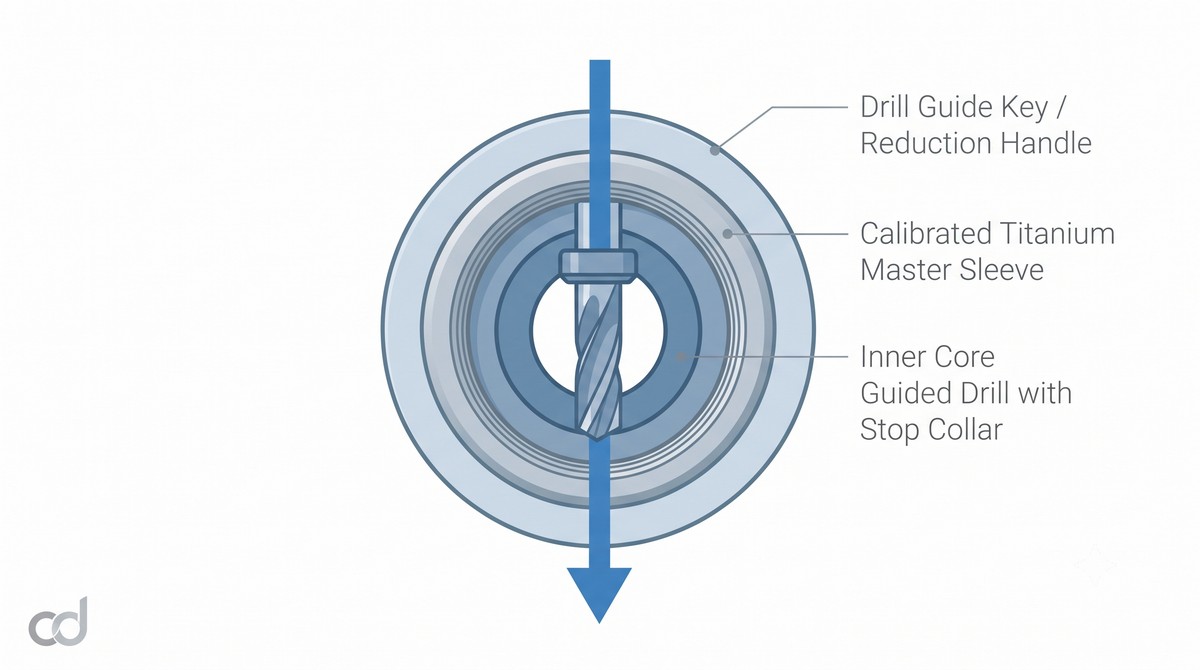
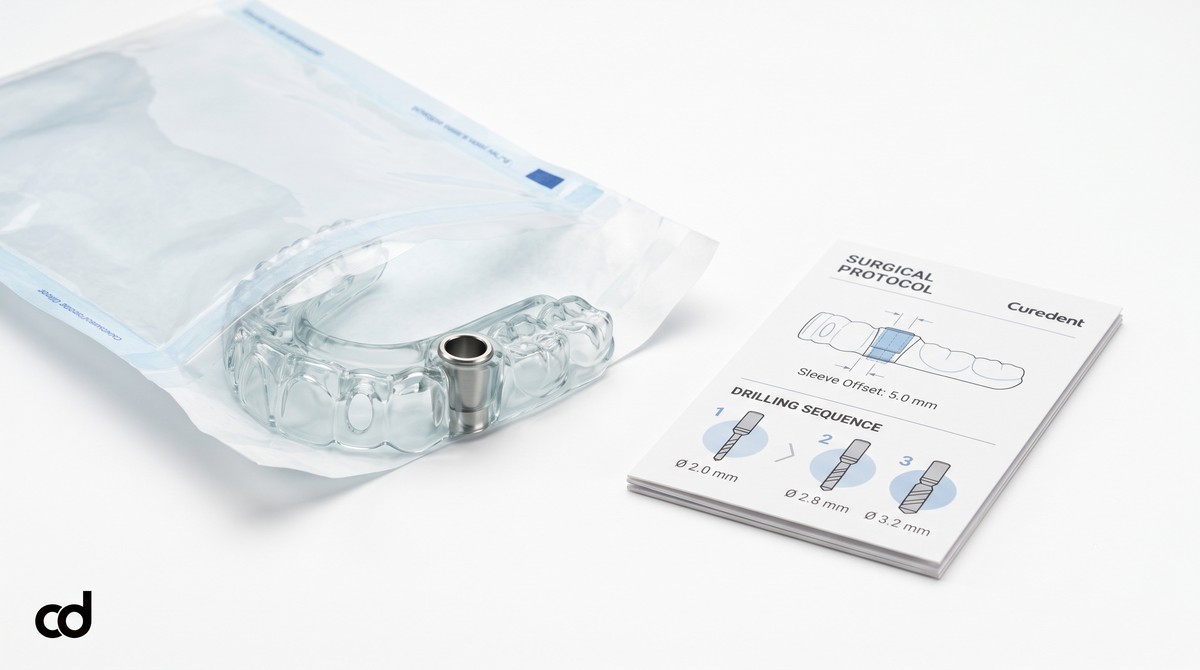
At the core of the template is a medical-grade titanium master sleeve permanently integrated into the resin cylinder. The sleeve provides a fixed mechanical interface that guides reduction keys and drill barrels along the designated trajectory. Engineered anti-rotational locks and mechanical retention grooves prevent sleeve dislodgement or spinning under high drill torque.
Seating Architecture and Inspection Windows
Stable positioning over the clinical dentition requires direct visual verification. The appliance features strategically positioned oval inspection windows over non-functional cusps and incisal edges. These viewports allow the surgeon to confirm intimate, gap-free contact between enamel surfaces and the internal guide wall prior to initiating osteotomy steps.
Digital-to-Physical Conversion Workflow
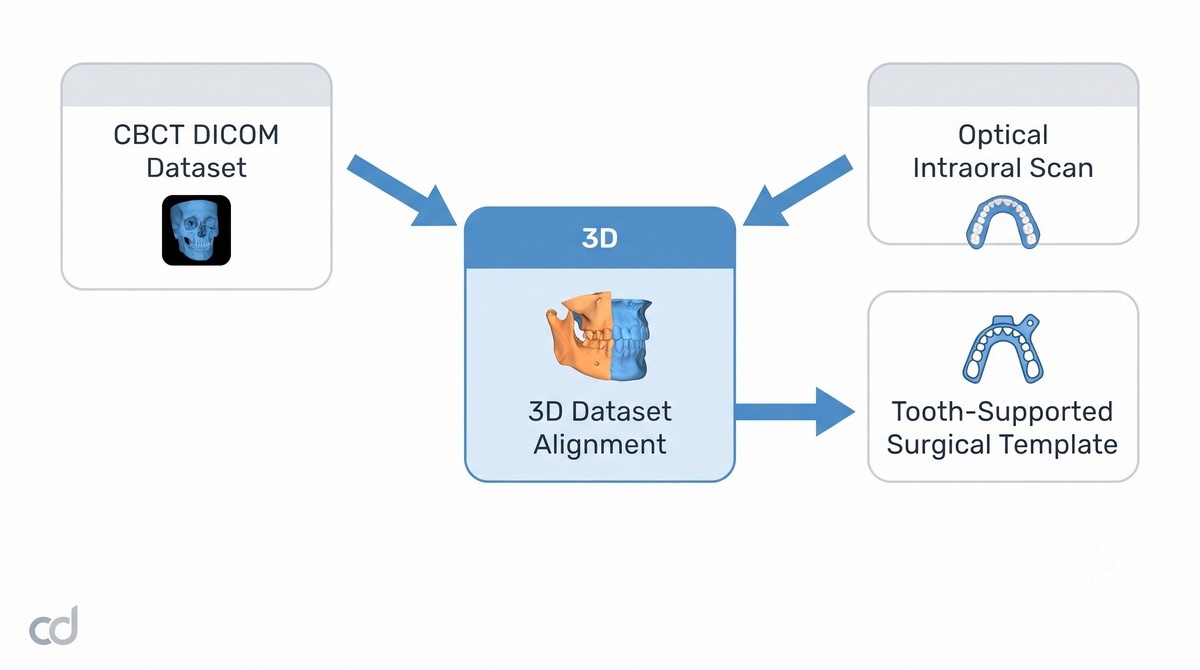
The physical guide begins with two digital records: the volumetric CBCT DICOM dataset (capturing bone volume, density, and root paths) and the high-resolution optical intraoral scan (capturing detailed enamel surfaces and mucosal contours). Through algorithmic 3D dataset alignment, these distinct files merge into a unified spatial environment. Undercuts are blocked using digital draft angles, sleeve positions are set to match the restorative plan, and the final CAD model is printed as a rigid, patient-specific tooth-supported surgical template.
Section 3: Indications & Clinical Applications
Primary Clinical Indications
The Curedent single-site guide provides targeted accuracy across partially edentulous presentations:
- Single-Tooth Edentulous Gaps: Ideal for bounded anterior and posterior spaces where angulation and proximity to adjacent roots are critical.
- Bounded Saddle Spaces: Supports premolar and molar replacements where multi-unit spacing requires strict parallel alignment.
- Short-Span Multi-Unit Sites: Facilitates adjacent fixture placement with matched trajectories for screw-retained bridges.
- Immediate Extraction Sockets: Stabilizes drill positioning against palatal or lingual cortical shelves, preventing drill slippage into empty extraction sockets.
Anatomical Checkpoints for Guided Feasibility:
[✓] Minimum 2 stable, non-mobile adjacent teeth mesial/distal
[✓] Interocclusal space >= 36 mm for drill access + sleeve
[✓] Ridge width >= 1.5 mm buccal/lingual plate clearance
[✗] Terminal free-end saddle with fewer than 3 stable teeth (Contraindicated)
Case Selection Criteria
- Stable Adjacent Dentition: Successful retention requires at least two stable natural teeth mesially and distally. Teeth must have sufficient clinical crown height and be free of active, advanced mobility.
- Adequate Interocclusal Clearance: The surgical site must accommodate the combined vertical height of the guide sleeve, reduction handle, and guided drill length. Patients should demonstrate an interocclusal opening of at least 36 mm.
- Keratinized Mucosal Band: Flapless protocols require a minimum 3 mm band of attached, keratinized tissue to prevent mucosal stripping during tissue punching.
Clinical Contraindications
- Severe Periodontal Mobility: Grade II or III mobility on anchor teeth prevents stable seating and leads to guide displacement under drill loads.
- Severe Trismus: Limited mouth opening prevents straight axial insertion of long guided drill barrels into posterior sites.
- Pronounced Bony or Dentin Undercuts: Unrelieved severe anatomical undercuts can prevent passive seating, causing guide rocking or fracture.
Guided Versus Freehand Decision Framework
While seasoned clinicians can achieve acceptable results with freehand techniques in wide molar spaces with dense bone, virtual implant planning becomes critical when working near anatomical hazards. If root apices converge, bone volume is narrow, or immediate restorative contours are demanded, guided placement replaces subjective tactile estimation with rigid mechanical execution.
Section 4: Clinical Workflow & Surgical Execution
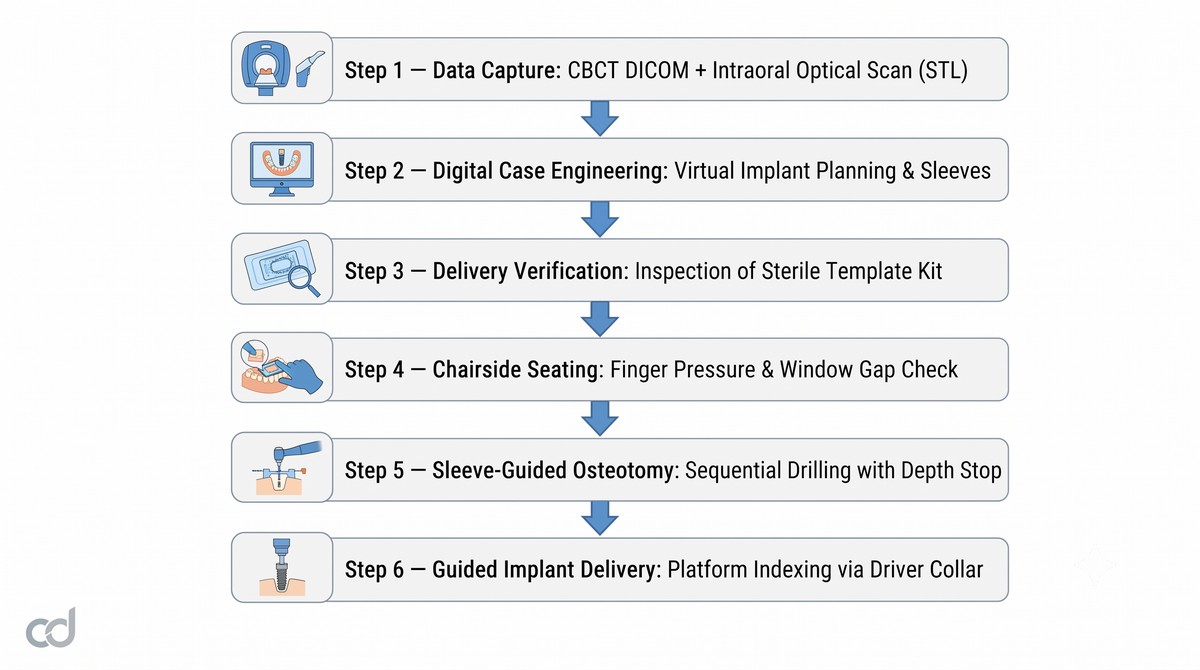
Step 1: Digital Data Acquisition
Acquire a clear CBCT DICOM dataset without patient motion artifacts. Capture a full-arch optical intraoral scan via an intraoral scanner, capturing deep pit-and-fissure anatomy, incisal edges, and the soft-tissue architecture of the edentulous gap.
Step 2: Virtual Planning by Curedent
Upload the DICOM and optical STL files to the Curedent portal. Curedent engineers register the files, model the virtual tooth restoration, align the implant fixture within alveolar bone boundaries, and set sleeve trajectory and offset height. The clinician reviews and approves the virtual plan.
Step 3: Unboxing and Verification
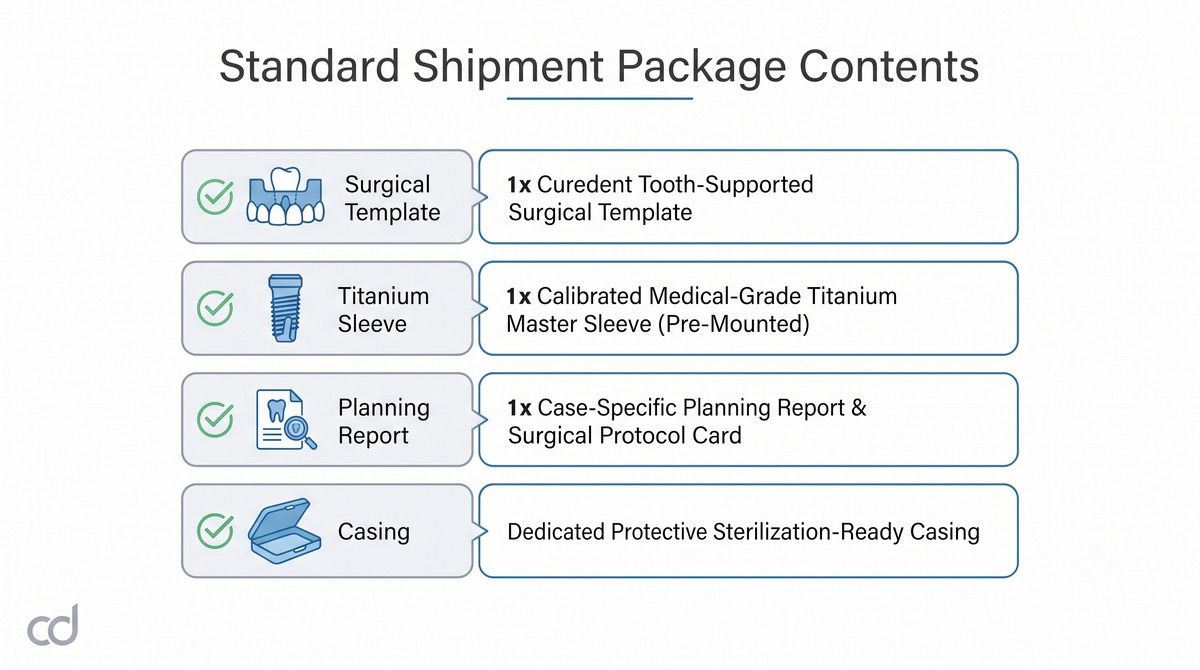
The guide arrives in dedicated, sterilization-ready packaging. Prior to surgery, inspect the guide for structural integrity, confirm the patient name and site designation, and verify that the embedded titanium sleeve sits flush within the polymer housing.
Step 4: Chairside Seating and Validation
- Anesthetize the surgical site using local infiltration. Avoid extensive block-induced soft tissue distension if flapless tissue punch is planned.
- Position the guide over the dentition. Apply firm, downward finger pressure across occlusal surfaces.
- Inspect every incisal and cuspal viewport. Ensure zero light gap between enamel surfaces and internal resin walls.
- Check for rotational stability: confirm there is no rocking or elastic rebound under directional finger pressure.
Step 5: Sleeve-Guided Osteotomy Protocol
Execution follows a systematic sleeve-guided osteotomy protocol using system-specific reduction keys and guided drill barrels:
- Soft Tissue Access: Perform a tissue punch through the master sleeve, or elevate a conservative full-thickness flap before reseating the guide.
- Flattening / Cortical Marking: Engage the flattening drill through the sleeve to establish a flat, perpendicular bone shelf, preventing subsequent drills from wandering.
- Pilot Osteotomy: Insert the 2.0 mm pilot drill reduction key into the master sleeve. Feed the pilot drill into the key before activating the handpiece to prevent cutting into the reduction key walls.
- Controlled Sequential Drilling: Advance through progressive diameter drills. Precise master sleeve calibration stabilizes the drill shaft along the planned long-axis vector.
- Physical Depth Locking: Advance each drill until the integrated drill stop bottoms out against the master sleeve collar. This mechanical guided drill stop depth control prevents over-instrumentation and preserves apical structures.
- Guided Implant Placement: Insert the implant through the sleeve using the guided implant driver. The driver collar bottoms out against the sleeve, locking platform depth and rotational timing.
Thermal Management and Saline Irrigation
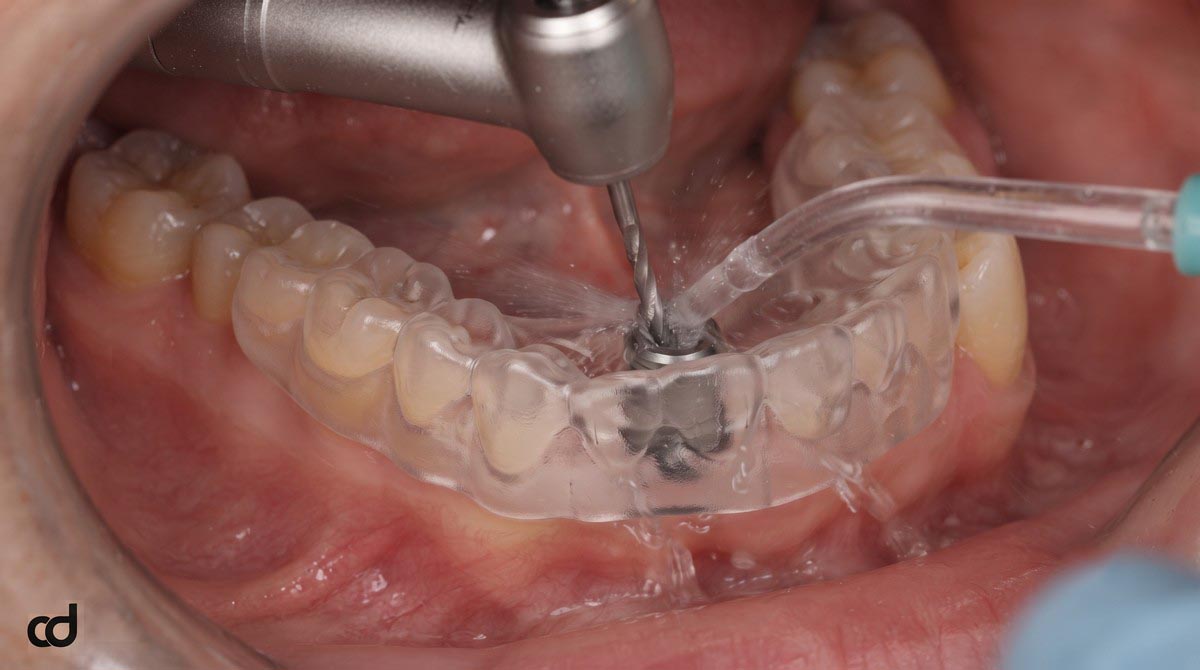
Enclosed guide sleeves restrict external saline access to cutting flutes. To prevent bone overheating:
- Direct chilled physiological saline straight into the sleeve port via an external irrigation needle.
- Use a gentle, continuous “in-and-out” pumping motion with 2-second cutting intervals.
- Clear bone chips from drill flutes between passes to prevent friction binding.
Section 5: Technical Specifications & Accuracy Standards
Certified Specification Standards
The Curedent surgical template is engineered to tight CAD/CAM tolerances, ensuring reliable clinical transfers from virtual designs to real-world anatomy.
| Parameter | Specification | Clinical Relevance |
| Material | Class IIa biocompatible surgical resin | High rigidity, zero intraoral toxic leaching |
| Printing method | DLP / SLA stereolithography | Captures micro-undercuts and occlusal anatomy |
| Layer resolution | ~50 microns | Smooth seating surface with passive fit |
| Master sleeve material | Medical-grade titanium | Resists frictional galling and drill-wear debris |
| Sleeve tolerance | 15–30 microns | Minimizes drill toggle while preventing binding |
| Guide type | Tooth-supported surgical template | High-stability anatomical anchor configuration |
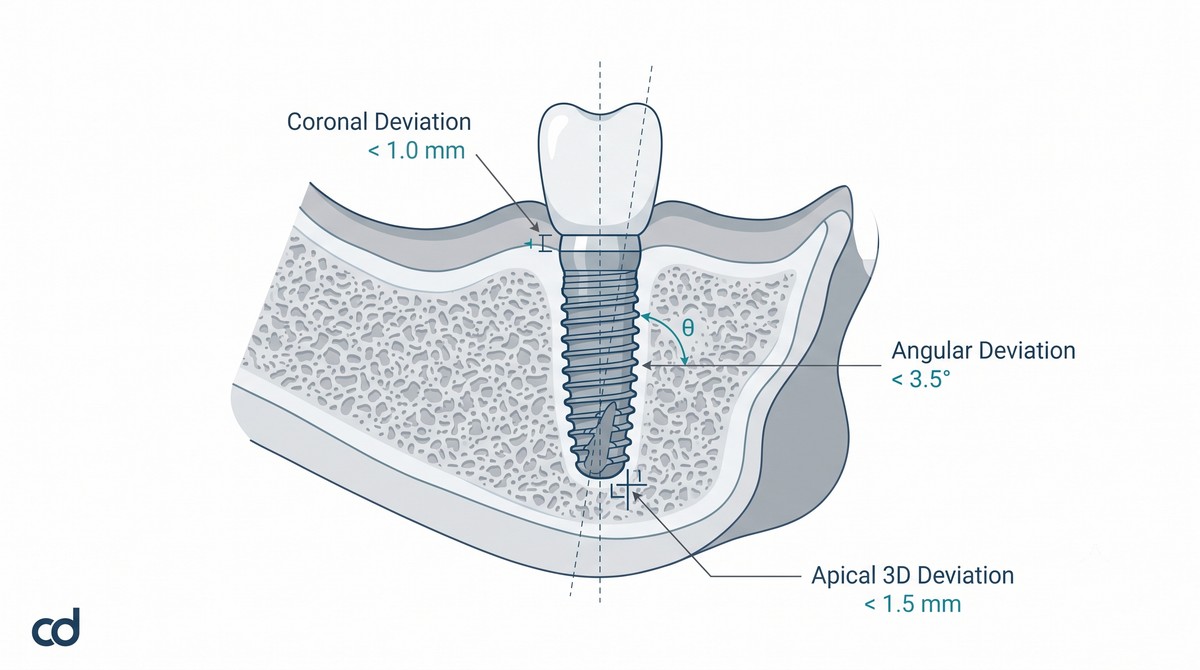
| Coronal deviation (clinical norm) | < 1.0 mm | Preserves restorative emergence dimensions |
| Apical 3D deviation (clinical norm) | < 1.5 mm | Protects neural canals, sinusal floors, and roots |
| Angular deviation (clinical norm) | < 3.5° | Aligns implant along planned prosthetic axis |
| Sterilization | Autoclavable / sterilization-ready delivery | Complies with surgical operatory protocols |
Deviation Norms and Accuracy Metrics
Guided osteotomies replace freehand variances with defined mechanical parameters:
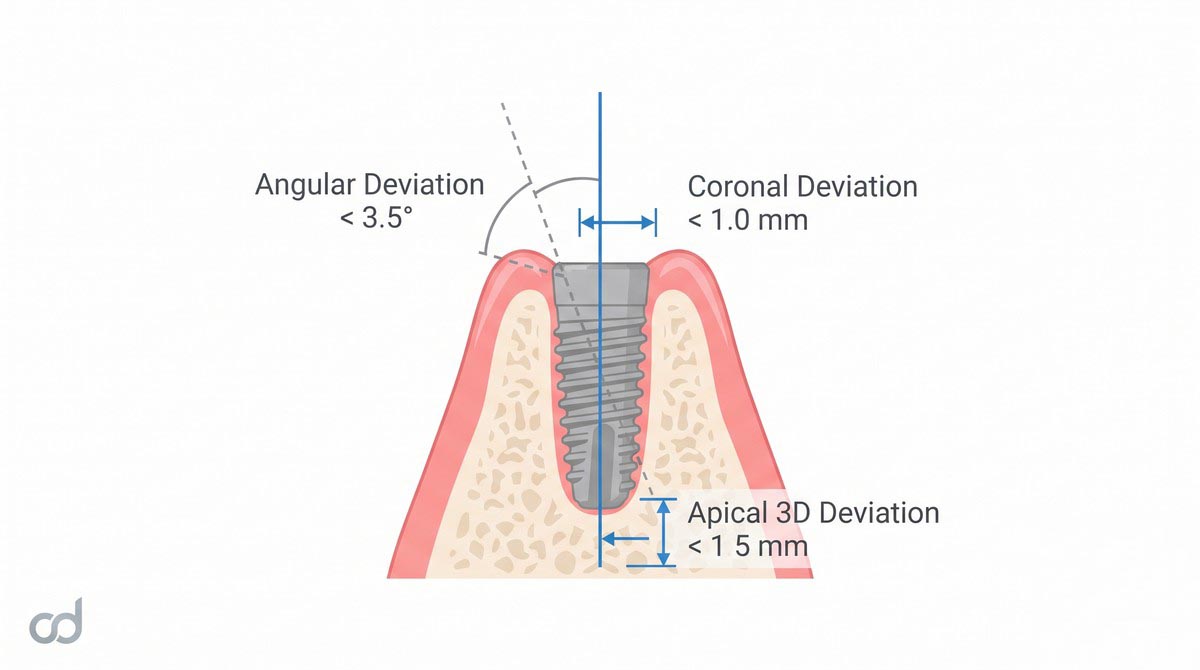
- Angular Deviation Reduction: Freehand preparations routinely show angular errors between 5° and 15°. Curedent guides achieve consistent angular deviation reduction to <3.5, ensuring long-axis occlusal loading and parallel alignment with adjacent crowns.
- Coronal Entry Point Accuracy: The mechanical sleeve maintains lateral position within <1.0 mm, ensuring the restorative screw access channel emerges through the planned cingulum or occlusal fossa.
- Controlled Apical 3D Deviation: Linear shifts at the osteotomy apex are kept within a mean apical 3D deviation of <1.5 mm, preserving a safe biological distance from adjacent periodontal ligaments and mandibular canals.
Section 6: Clinical Benefits & Practice Impact
Patient-Level Clinical Benefits
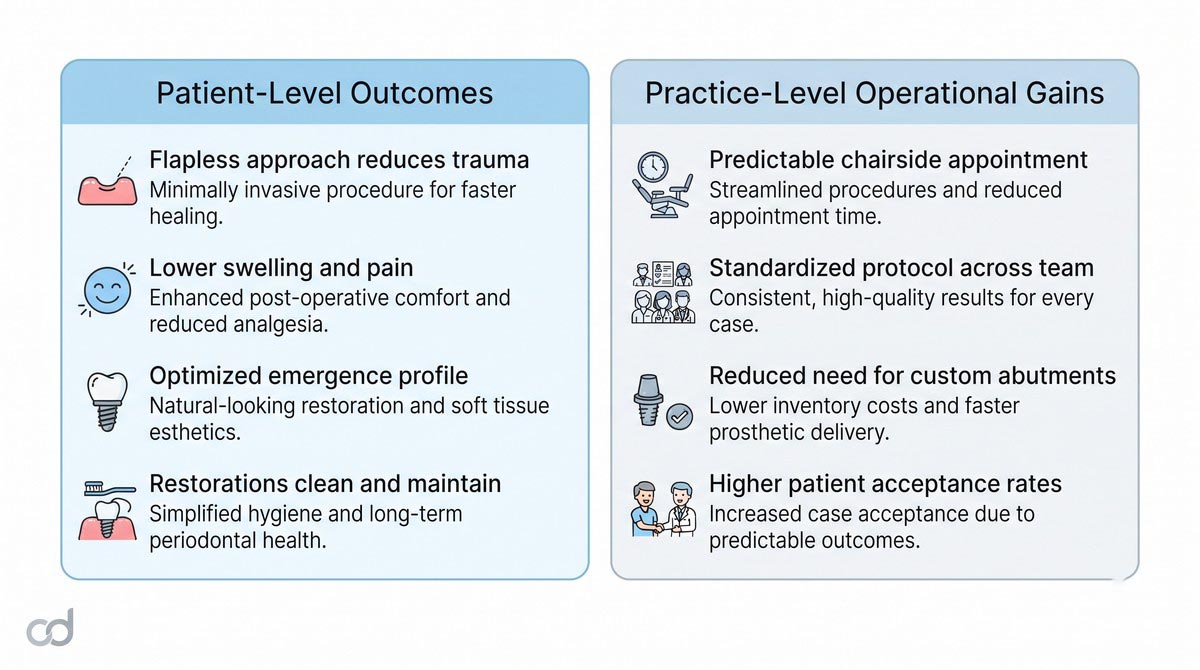
- Reduced Surgical Trauma: Accurate virtual planning often supports a flapless or mini-flap approach, preserving periosteal blood supply, reducing swelling, and speeding soft-tissue closure.
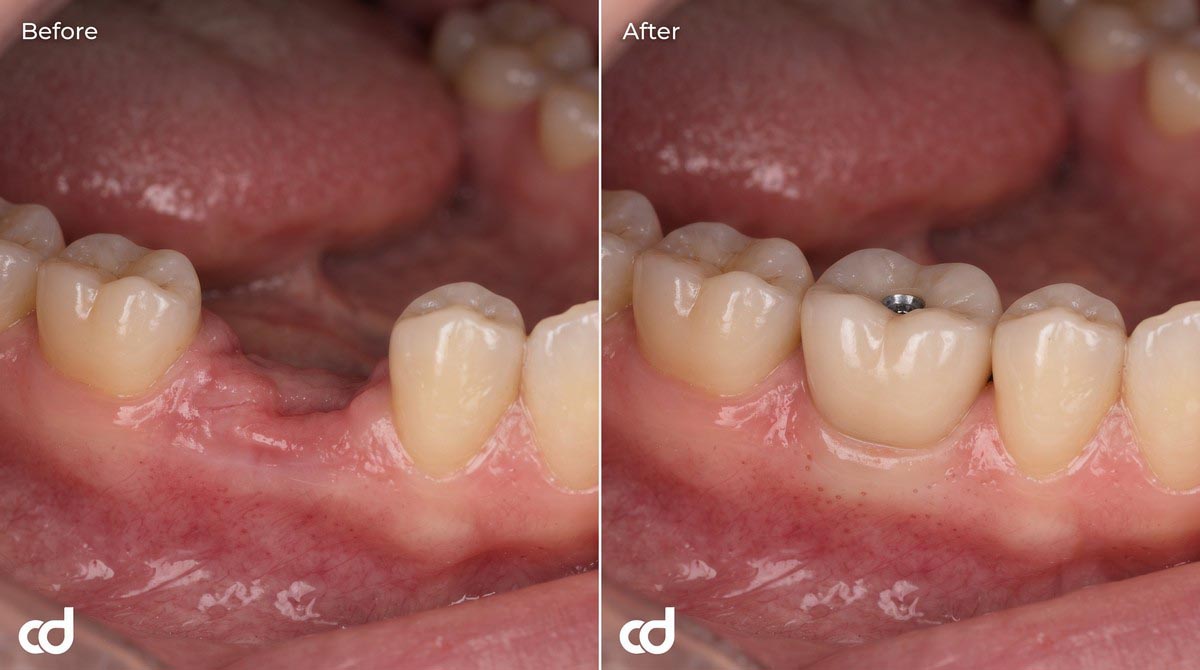
- Ideal Emergence Profiles: Fixtures placed in their ideal prosthetic envelope support natural-looking restorative contours and intact interdental papillae.
- Hygienic Restorative Design: Proper spacing away from adjacent roots allows patients to maintain oral hygiene, protecting against peri-implant mucositis.
Practice-Level Operational Advantages
- High Workflow Cost-Efficiency: Streamlined digital planning reduces intraoperative delays, standardizes consumables, and eliminates the need for expensive custom angled abutments to correct misaligned fixtures.
- Predictable Scheduling: A structured drilling sequence helps clinicians complete procedures within reliable appointment windows, improving operatory scheduling.
- Reduced Intraoperative Stress: Removing trajectory and depth guesswork allows surgeons to focus on patient comfort, soft-tissue handling, and bone quality management.
- Team-Wide Standardization: Guides create a repeatable surgical standard across multi-doctor practices and surgical-restorative referral teams.
The Shift to Routine Digital Care
Guided implant surgery has transitioned from an occasional technique for complex cases into the baseline standard for routine care. Modern digital workflows, rapid intraoral scanning, and automated additive manufacturing allow clinicians to deliver consistent surgical precision on everyday single-tooth cases, establishing reliable, long-term restorative outcomes.
Section 7: Ordering, FAQ & Call to Action
Ordering Workflow
Ordering custom surgical guides through Curedent is straightforward:
- Upload Case Scans: Log into the Curedent portal and upload the patient’s CBCT DICOM files along with upper and lower optical intraoral scans (STL/PLY).
- Review Digital Plan: Curedent engineers register datasets and model the virtual setup. Review the proposed fixture position and sleeve trajectory on your web browser, make adjustments if needed, and confirm approval.
- Fabrication and Dispatch: Curedent prints the guide at 50-micron resolution, seats the titanium sleeve, verifies fit, and ships the appliance in sterilization-ready packaging.
Standard Shipment Package Contents:
Frequently Asked Questions
Do I need to take a CBCT for every single-tooth guide?
Yes. A CBCT DICOM dataset is essential to assess 3D alveolar bone volume, detect internal pathology, locate nerves, and align root paths with surface models.
Can I use my existing surgical implant kit?
Yes. Curedent master sleeves are calibrated to match all major guided surgery systems. Simply specify your implant system and kit type (e.g., universal guided, brand-specific) during portal upload.
How is the master sleeve calibrated to my system?
Curedent selects the internal sleeve diameter and offset distance (e.g., 8 mm, 9 mm, or 10 mm) to match your kit’s guided drill collars, ensuring depth stops lock precisely at the planned osteotomy base.
What should I do if the guide rocks slightly during trial seating?
Inspect the viewports. If an air gap shows, check for newly placed restorations, debris, or deep unblocked undercuts. Relieve minor internal resin contacts along line angles with a fine diamond bur until the guide seats passively.
Is the Curedent resin material biocompatible?
Yes. Guides are manufactured from certified Class IIa biocompatible photopolymers that are non-cytotoxic, odor-free, and resistant to intraoral fluid absorption.
Suggested Clinical Solutions
- Expand your digital workflow to multi-unit cases with the Curedent Stackable Surgery Guide.
- Correct soft tissue asymmetries and maintain biological width with the Curedent Gum Reduction Guide.
- Ensure long-term stability after treatment with Curedent Clear Retainers.