Section 1: Product Introduction & Clinical Purpose
The Curedent Implant Impression Tray is a patient-specific, precision 3D-printed impression tray engineered to support open-tray pick-up impression techniques for multi-unit implant restorations. Developed for implant surgeons, prosthodontists, general dentists performing implant restorative work, laboratory managers, and dental technicians, this custom implant impression tray provides windowed access for guide pin management, rigid tray body construction for dimensional stability, and precision adaptation to the patient’s arch anatomy for reliable implant transfer accuracy.
Implant impression accuracy is the foundation of every successful multi-unit implant restoration. Unlike natural tooth impressions, implant impressions must transfer not only the tooth position but also the precise three-dimensional relationship between multiple implants, the soft-tissue contours, and the planned prosthetic framework. Any inaccuracy in this transfer—whether from tray flex, coping displacement, or guide pin interference—produces a master cast that cannot support a passively fitting framework. The Curedent Implant Impression Tray addresses this challenge directly. Its windowed tray design provides unobstructed access for guide pin unscrewing, its rigid construction prevents tray flex during impression set, and its precision adaptation ensures stable seating throughout the impression procedure.

Key Clinical Advantages
- Windowed Design for Guide Pin Access: Custom-positioned windows provide unobstructed access for guide pin unscrewing during open-tray pick-up impressions.
- Rigid Tray Body Construction: Engineered to resist flexural deformation under impression loading, maintaining dimensional stability throughout the impression set.
- Precision Arch Adaptation: Digitally designed from the patient’s intraoral scan for accurate, stable seating on natural dentition or soft tissue.
- Reliable Coping Engagement: Tray geometry is matched to the planned implant positions for stable impression coping engagement.
- Integrated Digital Workflow: CAD-designed from intraoral scans and implant position data for predictable clinical behavior.

Section 2: Product Anatomy & Physical Construction
Class IIa Biocompatible Printable Resin
Every Curedent Implant Impression Tray is 3D-printed from a certified Class IIa biocompatible printable resin formulated for dental impression applications. The material delivers high flexural rigidity, low water sorption, and dimensional stability under impression loading. Unlike hand-fabricated or vacuum-formed implant trays that exhibit variable thickness and irregular geometry, printed resin construction ensures uniform density and precise geometric execution across the entire tray body, including the windowed openings and the coping engagement zones.

Windowed Tray Design: Access for Open-Tray Pick-Up
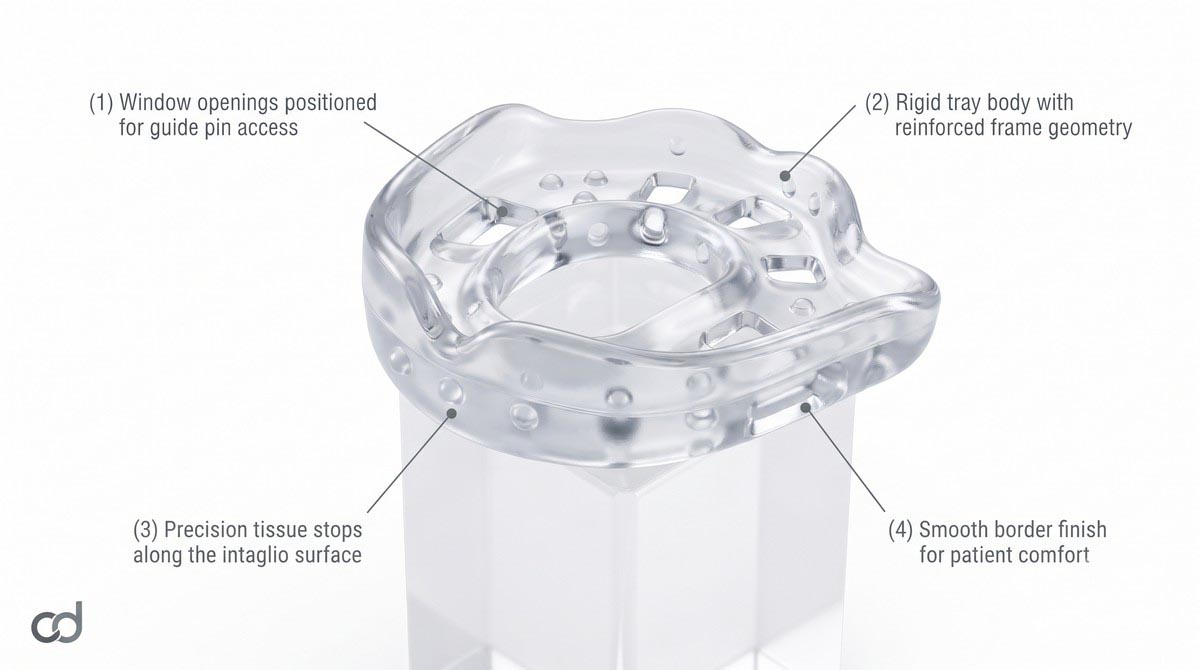
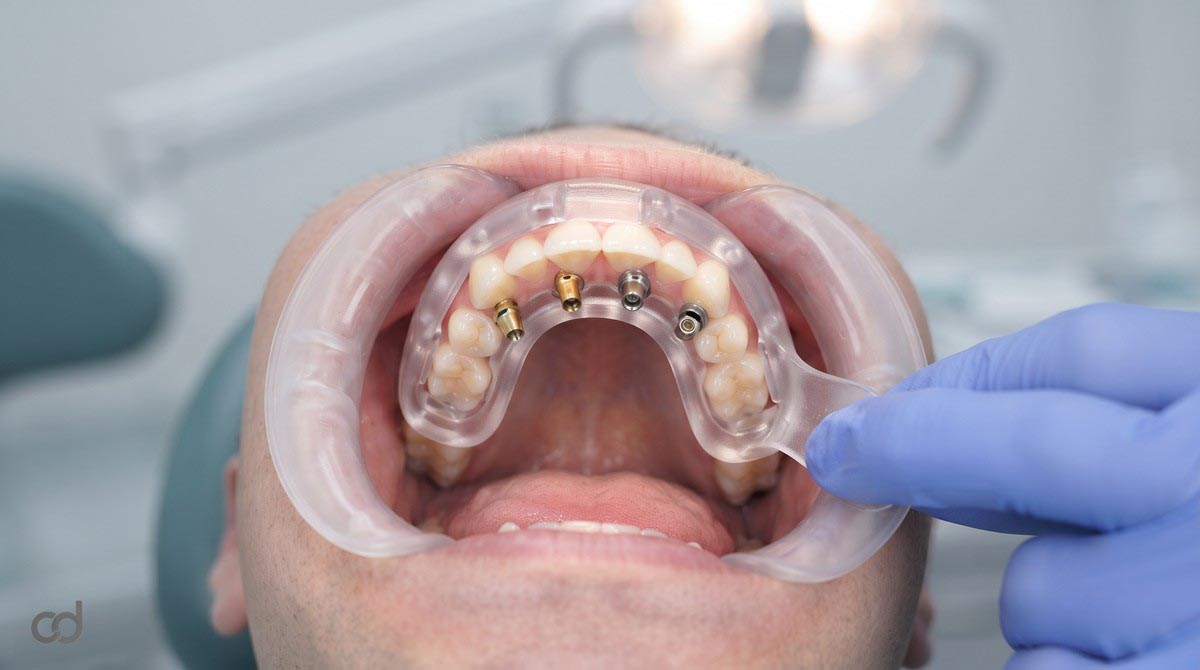
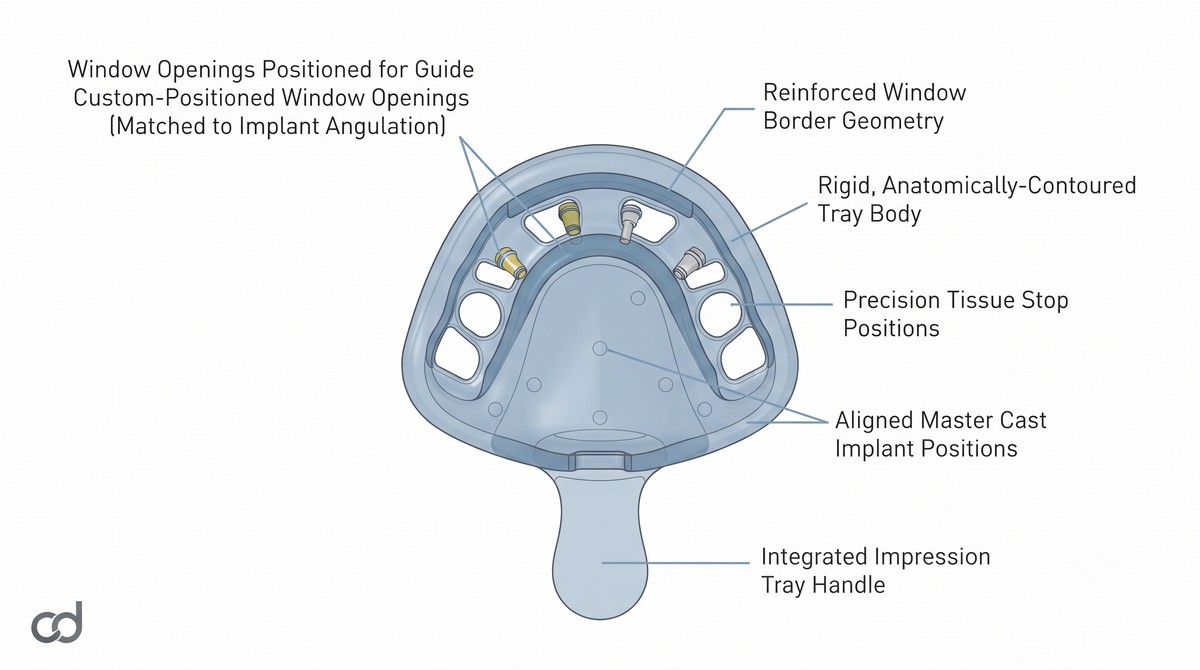
The defining feature of the appliance is its windowed tray design. Custom-positioned openings are cut through the tray body directly above each planned implant site, providing unobstructed access for guide pin unscrewing during the pick-up impression procedure. This windowed configuration is essential for the open-tray pick-up impression technique, where impression copings remain engaged with the implants while the tray is seated, and guide pins must be unscrewed through the tray before removal.
The windows are designed with the following characteristics:
- Custom-Positioned: Each window is positioned directly above the corresponding implant based on the patient’s implant position data.
- Adequately Sized: Window diameter is calibrated to allow clean guide pin access without compromising the tray’s structural rigidity.
- Smooth-Finished Edges: Window edges are polished to prevent material tearing or soft-tissue irritation during tray removal.
- Reinforced Borders: Window perimeter is reinforced to prevent flex or fracture under impression loading.
Rigid Tray Body and Dimensional Stability
The tray body is printed as a rigid, monolithic frame with a thickness calibrated to resist flexural deformation under impression loading. Implant impressions are particularly sensitive to tray flex—even minor flexural deformation during impression set or removal can displace impression copings and compromise the accuracy of the master cast. The Curedent Implant Impression Tray is engineered with a rigid frame geometry that maintains its shape throughout the impression procedure, ensuring reliable implant position transfer.
Precision Tissue Stops and Seating Stability
Tissue stops stability is engineered into the tray design through precision-printed contact points that seat directly on stable oral tissues—typically the palatal or lingual surfaces, the incisal edges, or the occlusal surfaces of unprepared posterior teeth. These stops establish a definitive vertical position for the tray, preventing drift or deep seating during impression taking. In implant cases, stable seating is particularly critical because tray movement during the impression procedure can displace the impression copings and produce inaccurate implant position transfer.
Border Geometry and Tray Rigidity Features
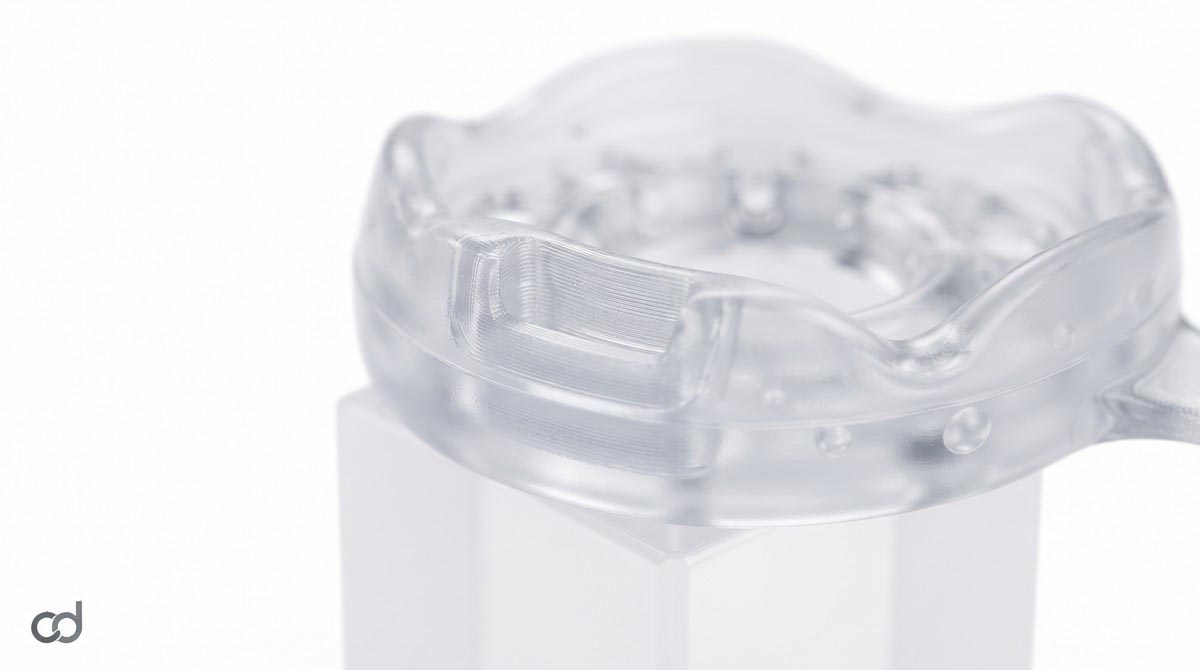
The tray borders are designed to extend slightly beyond the implant field, providing adequate material containment without impinging on soft tissue. The borders are smoothly finished to prevent patient discomfort during seating and removal. Rigidity features—including reinforced rims, internal ribbing, and window border reinforcement—prevent the tray from flexing under impression loading, maintaining dimensional stability throughout the procedure.
Digital Workflow and Milling Precision
[Intraoral Optical Scan (STL/PLY)] ──┐
├─► [Digital CAD Design] ──► [3D Printed Windowed Tray]
[Implant Position Data] ┘
The tray is designed entirely in CAD from the patient’s optical intraoral scan and implant position data (including implant brand, model, angulation, and depth). The digital design defines the relief space thickness, tissue stop positions, window positions, border geometry, and frame rigidity. The design is executed through high-resolution 3D printing, producing a monolithic tray with uniform density and precise geometric execution.
How Open-Tray Windows Allow Guide Pin Access
In an open-tray pick-up impression, the impression copings are first seated on the implants and the guide pins are engaged. The tray is then loaded with impression material and seated over the copings. Once the material has set, the guide pins must be unscrewed from the copings before the tray can be removed. The windows in the tray provide direct access to the guide pins, allowing the clinician to unscrew them without disturbing the set impression or displacing the copings. This is the essential function of the open-tray pick-up impression technique, and the Curedent tray’s custom-positioned windows are designed specifically to support it.

Section 3: Indications & Clinical Applications
Primary Clinical Indications
The Curedent Implant Impression Tray is indicated across a broad range of implant restorative applications:
- Multi-Unit Implant Impressions: Cases involving two or more implants where accurate positional transfer is essential for framework fit.
- Full-Arch Implant Cases: Full-arch implant-supported restorations requiring precise transfer of multiple implant positions.
- Cases Requiring Open-Tray Technique: Any implant impression where the open-tray pick-up technique is indicated for accurate coping transfer.
- Cases Where Passive Fit Is Critical: Implant-supported frameworks where passive fit requirements demand the highest level of impression accuracy.
Implant Impression Tray Feasibility Checklist:
[✓] Implant position data available (brand, model, angulation, depth)
[✓] Adequate diagnostic data (intraoral scan or diagnostic cast)
[✓] Planned restoration type identified (screw-retained or cement-retained)
[✓] Impression copings and guide pins available
[✗] Incomplete implant position data for tray design (Contraindicated)
Case Selection Criteria
- Number of Implants: The tray is designed for single or multi-unit implant cases. For single implant impressions with straightforward angulation, a simpler tray design may be adequate. For multi-unit cases with complex angulation or deep tissue, the windowed design provides essential access.
- Implant Angulation: Implants with divergent or complex angulation require custom-positioned windows that align with the guide pin trajectory. The Curedent design captures this angulation from the implant position data.
- Tissue Depth: Soft-tissue depth affects the length of the impression copings and the position of the guide pins. The window positions are calibrated to the tissue depth and coping height.
- Planned Restoration Type: Screw-retained and cement-retained restorations have different impression accuracy requirements. Screw-retained frameworks with strict passive fit requirements benefit most from the precision of the Curedent Implant Impression Tray.
Open-Tray vs Closed-Tray Technique Selection
Implant impressions can be taken using either open-tray or closed-tray techniques, and the choice depends on the clinical scenario:
- Open-Tray Pick-Up Impression: The impression copings remain engaged with the implants while the tray is seated and the impression material sets. Guide pins must be unscrewed through the tray windows before removal. This technique is preferred for multi-unit cases, divergent implant angulation, and cases where passive fit is critical.
- Closed-Tray Transfer Technique: The impression copings are seated on the implants, and the tray is seated with the copings transferring into the set material. The copings then remain in the impression when the tray is removed. This technique is simpler but less accurate for multi-unit cases and cases with divergent angulation.
The closed-tray transfer technique is appropriate for single implants with favorable angulation and shallow tissue. However, for multi-unit cases, divergent angulation, or cases where passive fit is critical, the open-tray technique is strongly preferred. The Curedent Implant Impression Tray is designed specifically to support open-tray pick-up impressions in these more demanding clinical scenarios.
Passive Fit Requirements in Multi-Unit Implant Restorations
Passive fit requirement is a central concept in implant prosthetics. A passively fitting framework seats on the implants without inducing stress, strain, or misfit at the implant-abutment interface. When a framework is not passive, the misfit stress can lead to:
- Screw loosening: Repeated stress on the prosthetic screws causes them to loosen over time.
- Implant overload: Misfit stress is transferred to the implant-bone interface, potentially compromising osseointegration.
- Framework fracture: High stress concentrations can cause the framework or veneering material to fracture.
- Peri-implant complications: Chronic misfit stress can contribute to peri-implant mucositis or peri-implantitis.
Achieving passive fit requires accurate transfer of implant position from the mouth to the master cast. The Curedent Implant Impression Tray supports this objective through its rigid construction, custom-positioned windows, and precision adaptation to the patient’s arch anatomy.
Typical Clinical Scenarios
- Two-Implant Bridges: Cases involving two implants supporting a screw-retained or cement-retained bridge, where accurate positional transfer is essential.
- Multi-Unit Screw-Retained Frameworks: Cases requiring precisely fitted frameworks with strict passive fit requirements.
- Full-Arch Implant-Supported Prostheses: Full-arch cases with multiple implants requiring accurate positional transfer and reliable coping engagement.
- Implant Cases with Divergent Angulation: Cases where implant angulation is not parallel, requiring custom window positioning for guide pin access.
Section 4: Clinical Workflow & Impression Protocol

Step 1: Data Acquisition
Acquire a high-resolution optical intraoral scan of the patient’s dental arch, capturing the implant sites, soft-tissue contours, and adjacent teeth. Record the implant position data, including implant brand, model, diameter, length, angulation, and depth. Ensure that the scan captures adequate detail for accurate tray design and window positioning.
Step 2: Digital CAD Design
Curedent digital engineers design the tray within a CAD environment. The window positions are calculated from the implant position data, ensuring that each window aligns precisely with the guide pin trajectory. The relief space is established at a uniform thickness across the implant field, and tissue stops are positioned at stable anatomical landmarks. The clinician reviews and approves the virtual design before printing.
Step 3: High-Resolution 3D Printing
The approved design is 3D-printed at high resolution using Class IIa biocompatible printable resin. The printing process produces a monolithic tray with uniform density and precise geometric execution, including the window openings and reinforced window borders. The tray is post-processed, cleaned, and inspected for surface quality before dispatch.
Step 4: Delivery Verification
Upon receiving the tray, inspect it on the master model: confirm that the window openings align with the planned implant positions, verify that tissue stops engage stable anatomical landmarks, check that the tray borders are smooth and continuous, and ensure that the tray body is rigid without flexural deformation.
Step 5: Seating the Tray and Engaging Impression Copings
- Seat the impression copings on the implants and verify that they are fully engaged. Tighten the guide pins to the manufacturer’s recommended torque.
- Perform a dry trial seating of the tray to confirm that the window openings align with the guide pins and that the tray seats passively without rocking.
- Apply tray adhesive to the intaglio surface of the tray, if recommended by the impression material manufacturer.
- Load the tray with the selected impression material, distributing it evenly across the tray surface.
- Seat the tray over the copings, ensuring that the guide pins pass cleanly through the window openings.
- Maintain stable seating pressure throughout the impression set.

Step 6: Unscrewing Guide Pins Through Windows
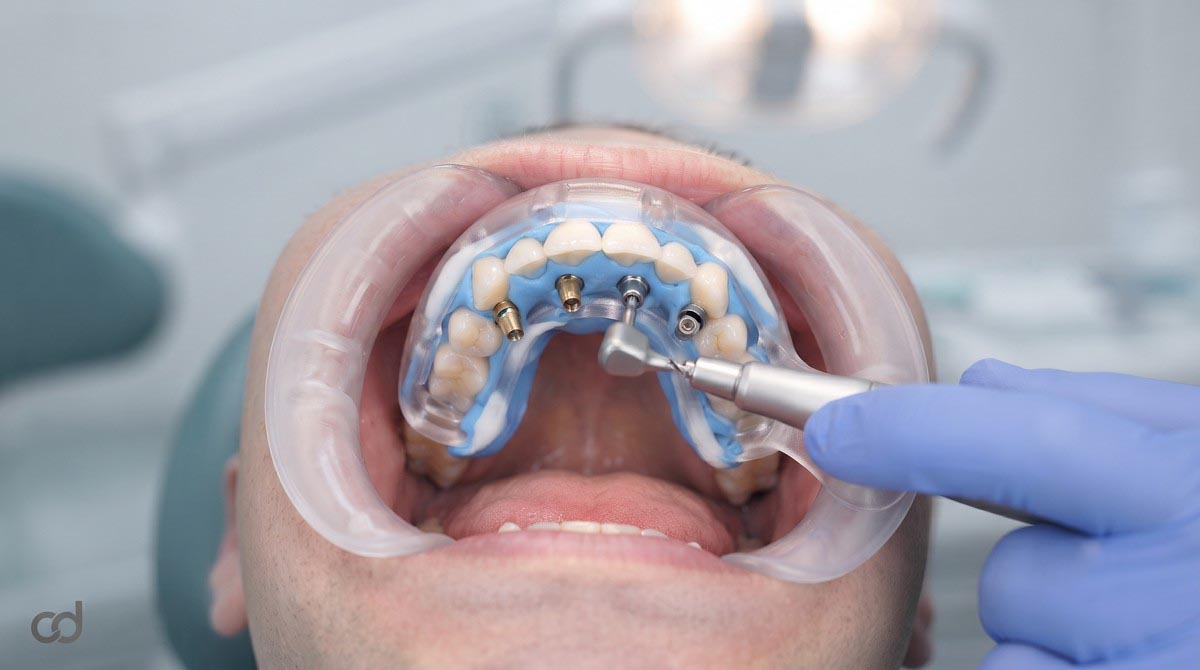
After the impression material has fully set, unscrew the guide pins through the window openings using the appropriate driver. Unscrew each pin completely, taking care not to disturb the set impression or displace the copings. Once all guide pins have been removed, gently remove the tray from the mouth using a firm, even pull along the path of insertion.
Step 7: Master Cast Pouring and Implant Analog Placement
Inspect the impression for:
- Complete coping transfer: Every impression coping should be fully engaged in the set material.
- Accurate implant position reproduction: The copings should be positioned precisely as they were in the mouth.
- Uniform material thickness: The impression should show consistent material thickness around the copings.
- Absence of voids or tears: The impression should be free of voids, tears, or distortion around the implant sites.
Attach the implant analogs to the impression copings, and pour the master cast using standard dental laboratory protocols. Verify that the analogs are accurately positioned in the cast and that the implant position transfer is reliable.
Guide Pin Unscrewing Sequence and Tray Removal Safety
Guide pin unscrewing must be performed in a controlled, methodical sequence to avoid disturbing the set impression. Unscrew each pin in a small increment, then move to the next pin, working around the arch until all pins are fully disengaged. This staged approach prevents the impression from being lifted unevenly during removal. Once all pins are disengaged, remove the tray with a firm, even pull along the path of insertion. Avoid rocking or twisting the tray during removal, as this can displace the copings or distort the impression.

Section 5: Technical Specifications & Manufacturing Standards
Certified Technical Specifications
The Curedent Implant Impression Tray is manufactured to strict biomedical and dimensional tolerances to ensure reliable implant transfer accuracy and predictable master cast fabrication.
| Parameter | Specification | Clinical Relevance |
|---|---|---|
| Material | Class IIa biocompatible printable resin | High rigidity, dimensional stability, non-toxic |
| Fabrication method | Precision 3D printing | Monolithic construction, uniform density |
| Tray design | Windowed, rigid, custom-matched to implant positions | Guide pin access and dimensional stability |
| Window position tolerance | Engineered to align with planned implant angulation | Reliable guide pin access during impression |
| Tray body rigidity | Engineered to prevent flex during impression set | Maintains coping position throughout procedure |
| Coping engagement | Compatible with standard open-tray impression copings | Reliable transfer of implant position |
| Fit tolerance | Engineered for stable seating on natural dentition or soft tissue | Passive seating without rocking |
| Purpose | Open-tray pick-up impression for multi-unit implant restoration | Accurate transfer for passive-fitting frameworks |
| Sterilization | Autoclavable / delivered ready for clinical use | Complies with standard clinical workflows |
| Case compatibility | Single or multi-unit implant cases | Flexible across a range of implant restorative scenarios |
Window Position Tolerance and Implant Transfer Accuracy
The implant transfer accuracy of the Curedent Implant Impression Tray depends on precise window positioning and tray rigidity:

- Window Position Tolerance: Window openings are positioned within ± 0.10 mm of the planned guide pin trajectory, ensuring clean, unobstructed access during the impression procedure.
- Coping Engagement Stability: The tray geometry is matched to the planned coping positions, ensuring that the copings remain stable and accurately positioned throughout the impression set.
- Tray Body Rigidity: The tray body is engineered to resist flexural deformation under impression loading, maintaining dimensional stability and preventing coping displacement during impression removal.
Square Impression Coping Accuracy in Multi-Unit Cases
The square impression coping accuracy is a critical factor in the reliability of multi-unit implant impressions. Square impression copings—used in open-tray pick-up techniques—provide anti-rotational engagement with the implant and precise positional transfer. The Curedent Implant Impression Tray is designed to support this accuracy by providing stable coping engagement, unobstructed guide pin access, and rigid dimensional stability throughout the procedure. The result is a master cast that faithfully reproduces the implant position, supporting the fabrication of passively fitting frameworks.
Section 6: Clinical Benefits & Practice Impact
Patient-Level Clinical Benefits
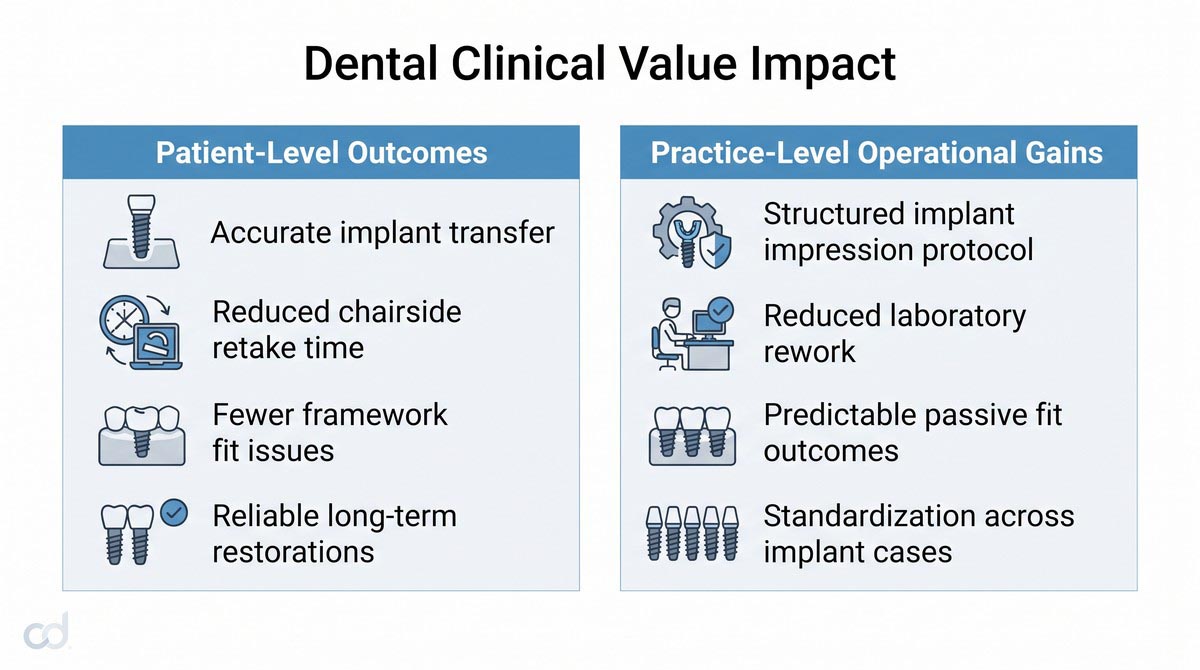
- Accurate Implant Transfer: The windowed tray design and rigid construction support reliable implant position transfer from the mouth to the master cast, reducing the risk of misfit frameworks and their associated complications.
- Reduced Chairside Retake Time: Stable tray seating, unobstructed guide pin access, and controlled material distribution reduce the incidence of impression retakes, minimizing chairside time and patient discomfort.
- Fewer Framework Fit Issues: Accurate master casts produce passively fitting frameworks, reducing the need for chairside adjustment, sectioning, or remake of implant restorations.
- Reliable Long-Term Restorations: Passive fit supports long-term implant and restoration health, reducing the risk of screw loosening, implant overload, and peri-implant complications.
Practice-Level Operational Advantages
- Routine Adoption of Custom Implant Impression Protocols: Integrating the Curedent Implant Impression Tray into the implant restorative workflow standardizes impression accuracy and reduces the variability associated with stock trays.
- Reduced Laboratory Rework: Accurate master casts reduce the frequency of laboratory rework, saving time, materials, and cost.
- Predictable Passive Fit Outcomes: A structured custom tray protocol allows clinical teams to manage multi-unit implant cases with consistent, repeatable workflows, improving framework fit and long-term success.
- Standardization Across Implant Cases: The Curedent Implant Impression Tray is compatible with a wide range of implant systems and clinical scenarios, providing a standardized workflow across the practice’s implant restorative cases.
Custom Implant Impression Trays as the Modern Standard
Stock implant impression trays cannot deliver the impression accuracy that modern multi-unit implant restorations demand. They produce uneven material thickness, unstable seating, and inadequate guide pin access—all of which compromise implant position transfer. The Curedent Implant Impression Tray combines the accuracy of custom fabrication with the reproducibility of digital design and 3D printing. By using the Curedent Implant Impression Tray for multi-unit implant impression cases, clinicians can achieve the master cast accuracy that passively fitting frameworks demand.

Integrating the Implant Impression Tray with Other Curedent Appliances
For precision impressions in non-implant restorative cases, the Curedent Custom Tray provides uniform relief and stable tissue stops. For implant restorative cases requiring occlusal analysis, the Curedent Occlusal Splint supports diagnostic occlusal verification. For post-restorative protection, Curedent Night Guards provide bruxism management.

Section 7: Ordering, FAQ & Call to Action
Simple Three-Step Ordering Workflow
Ordering the Curedent Implant Impression Tray through the doctor portal is designed to be efficient:
[Step 1: Upload Data] ──► [Step 2: Review Digital Design] ──► [Step 3: Receive Tray]
Scan + Implant Data CAD Approval via Portal Printed & Ready to Use
- Upload Case Records: Access the Curedent portal and upload the patient’s optical intraoral scan (STL or PLY format) and implant position data, including implant brand, model, diameter, length, angulation, and depth. Note the planned restoration type and impression technique.
- Review Digital Design: Curedent engineers design the tray with custom-positioned windows aligned to the planned implant positions, uniform relief space, and precision tissue stops. Review and approve the design via the interactive web viewer.
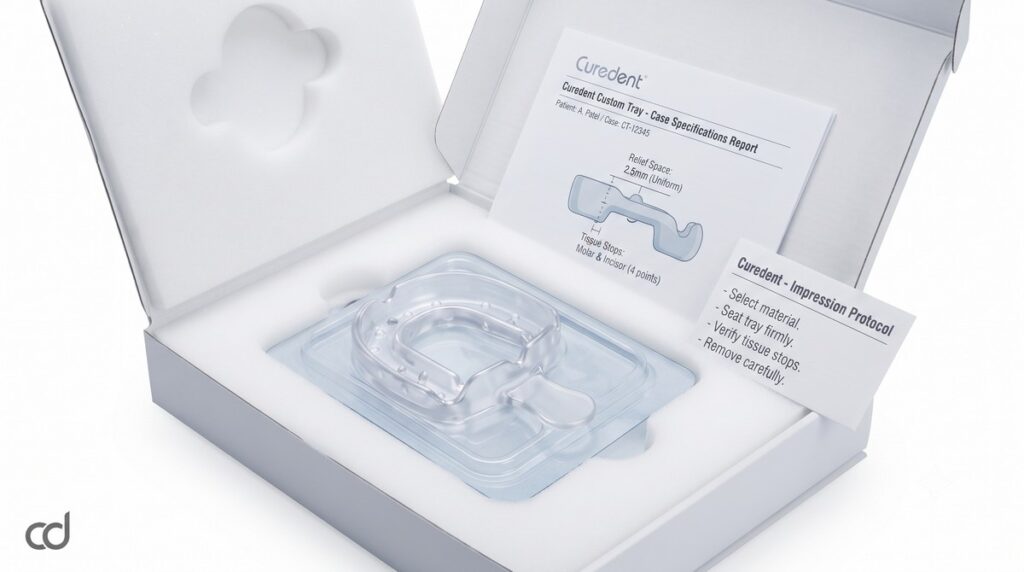
- Receive and Deliver: Curedent prints the tray at high resolution using Class IIa biocompatible resin, inspects window alignment and tray rigidity, packages the tray in protective clinical casing, and dispatches it directly to your practice.
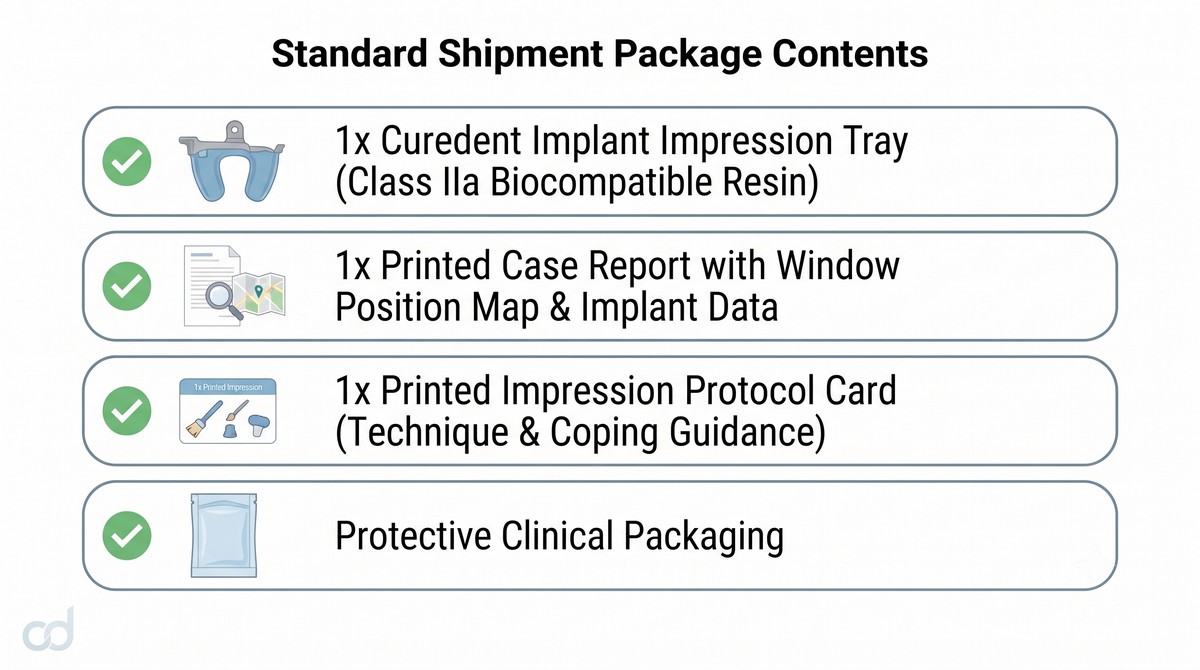
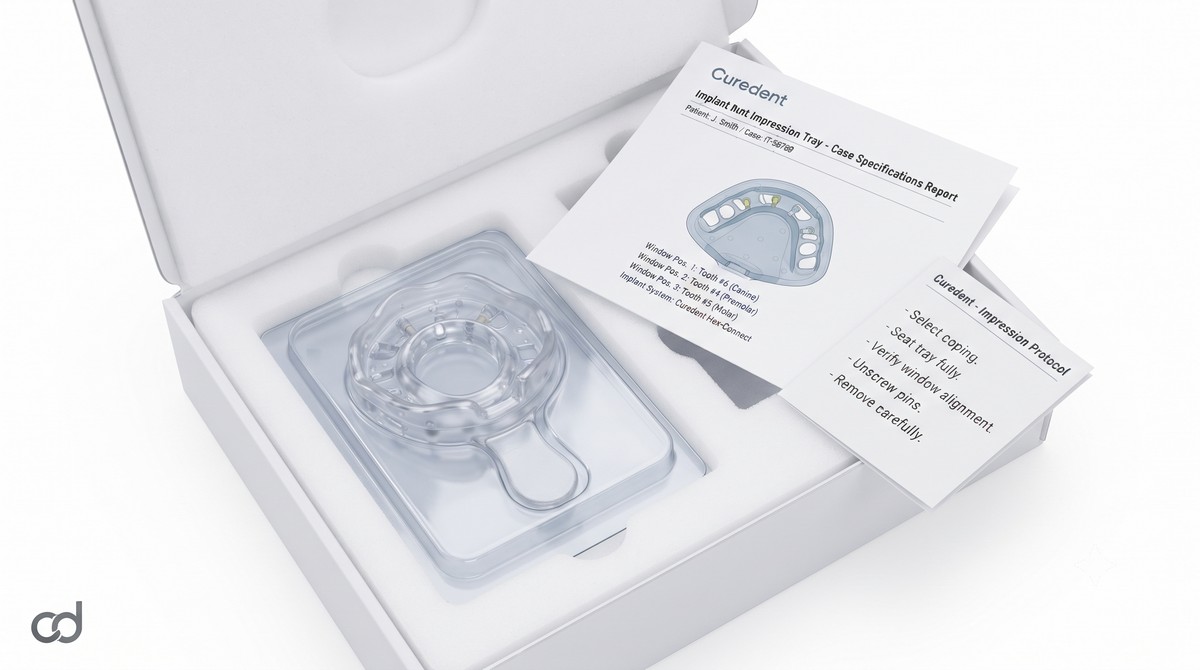
Standard Shipment Package Contents:
Frequently Asked Questions
Can I use my own impression copings with the Curedent Implant Impression Tray?
Yes. The Curedent Implant Impression Tray is compatible with standard open-tray impression copings from all major implant systems. Provide the implant brand and model during case submission so that the window positions and tray geometry can be matched to the specific coping design.
How many implants can the tray accommodate?
The Curedent Implant Impression Tray can accommodate single or multi-unit implant cases, including full-arch cases with multiple implants. Provide the complete implant position data during case submission so that window positions can be accurately planned.
Do I need to send implant brand and model information?
Yes. Accurate window positioning and coping clearance require the implant brand, model, diameter, length, and angulation. Without this information, the tray cannot be designed to align with the guide pin trajectory, and the open-tray technique may be compromised.
Is the tray autoclavable?
Yes. The Class IIa biocompatible printable resin used for Curedent Implant Impression Trays is compatible with standard autoclave sterilization cycles. Follow the autoclave manufacturer’s recommended cycle parameters, and allow the tray to cool completely before use.
What if the guide pin doesn’t align with the window?
If the guide pin does not align cleanly with the window during trial seating, first verify that the correct tray has been seated (check the case ID). If alignment is still compromised, the implant angulation may have shifted since the scan was taken, or the window position may require adjustment. Contact Curedent case management for support, and consider whether a new scan is needed to reflect the current implant position.
Suggested Clinical Solutions
- Manage non-implant precision impressions with the Curedent Custom Tray.
- Stabilize occlusion for implant restorative cases with the Curedent Occlusal Splint.
- Protect implant restorations with Curedent Night Guards.